RosCard Configuration
Learn how to install and configure RosCard — the custom card package that optimizes your Home Assistant dashboard for the Astrion Remote's 3.1-inch touchscreen.
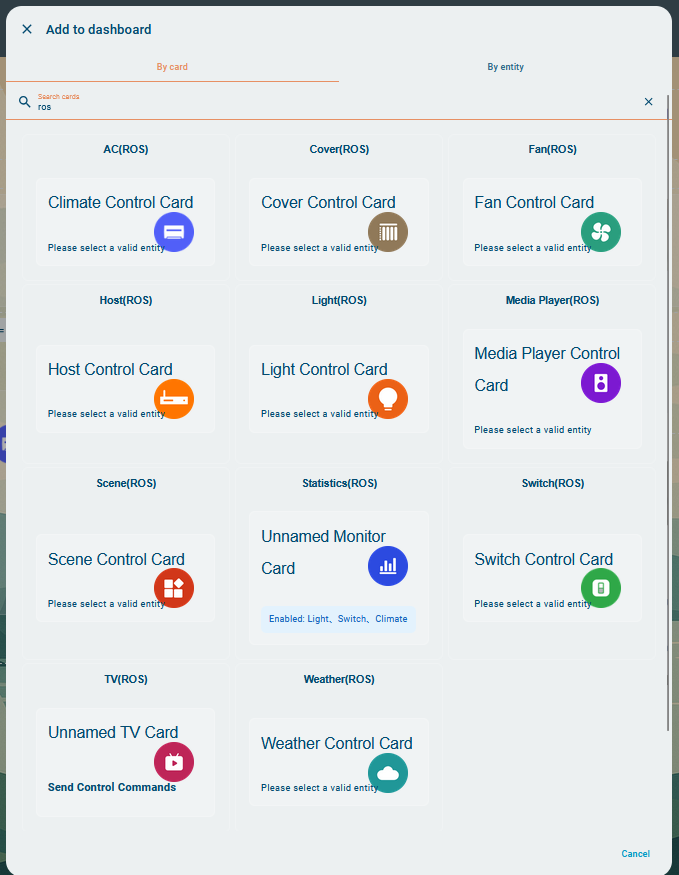
What is RosCard?
RosCard is a collection of advanced UI cards designed for seamless integration between Home Assistant and the Astrion ecosystem. It enables dynamic, state-aware control interfaces optimized for remotes, wall panels, and touch dashboards.
Without RosCard, your Astrion Remote cannot communicate with or control any devices in your Home Assistant ecosystem. RosCard serves as the communication bridge between your Astrion Remote hardware and your Home Assistant instance.
Design Philosophy
RosCard follows a Home Assistant–native architecture:
- Home Assistant = Brain — all automation logic remains centralized
- RosCard = Interaction Layer — handles UI and state-aware controls
- Astrion Remote = Interface — delivers the user experience
This ensures consistent device state, multi-room synchronization, and automation reliability.
💡 Key Insight: RosCard is configuration only — it generates card layouts and entity bindings. All control logic remains inside Home Assistant. This means you can modify your dashboard without affecting your automations.
🔑 Understanding RosCard's Role: RosCard is configuration software — it defines how your dashboard looks and which entities are bound to each card. The Astrion Remote reads this configuration and renders the UI accordingly. All actual device control (turning on a light, setting a temperature, triggering a scene) is executed by Home Assistant itself — not by RosCard.
🔗 Related: RosCard works alongside Astrion Home Integration — RosCard handles the user interface layer, while Astrion Home Integration handles the Home Assistant backend integration (IR control, device discovery, etc.).
Installation
Prerequisites
- Home Assistant 2024.x or newer (latest recommended)
- Astrion Remote firmware ≥ 1.1.1
- HACS (Home Assistant Community Store) installed
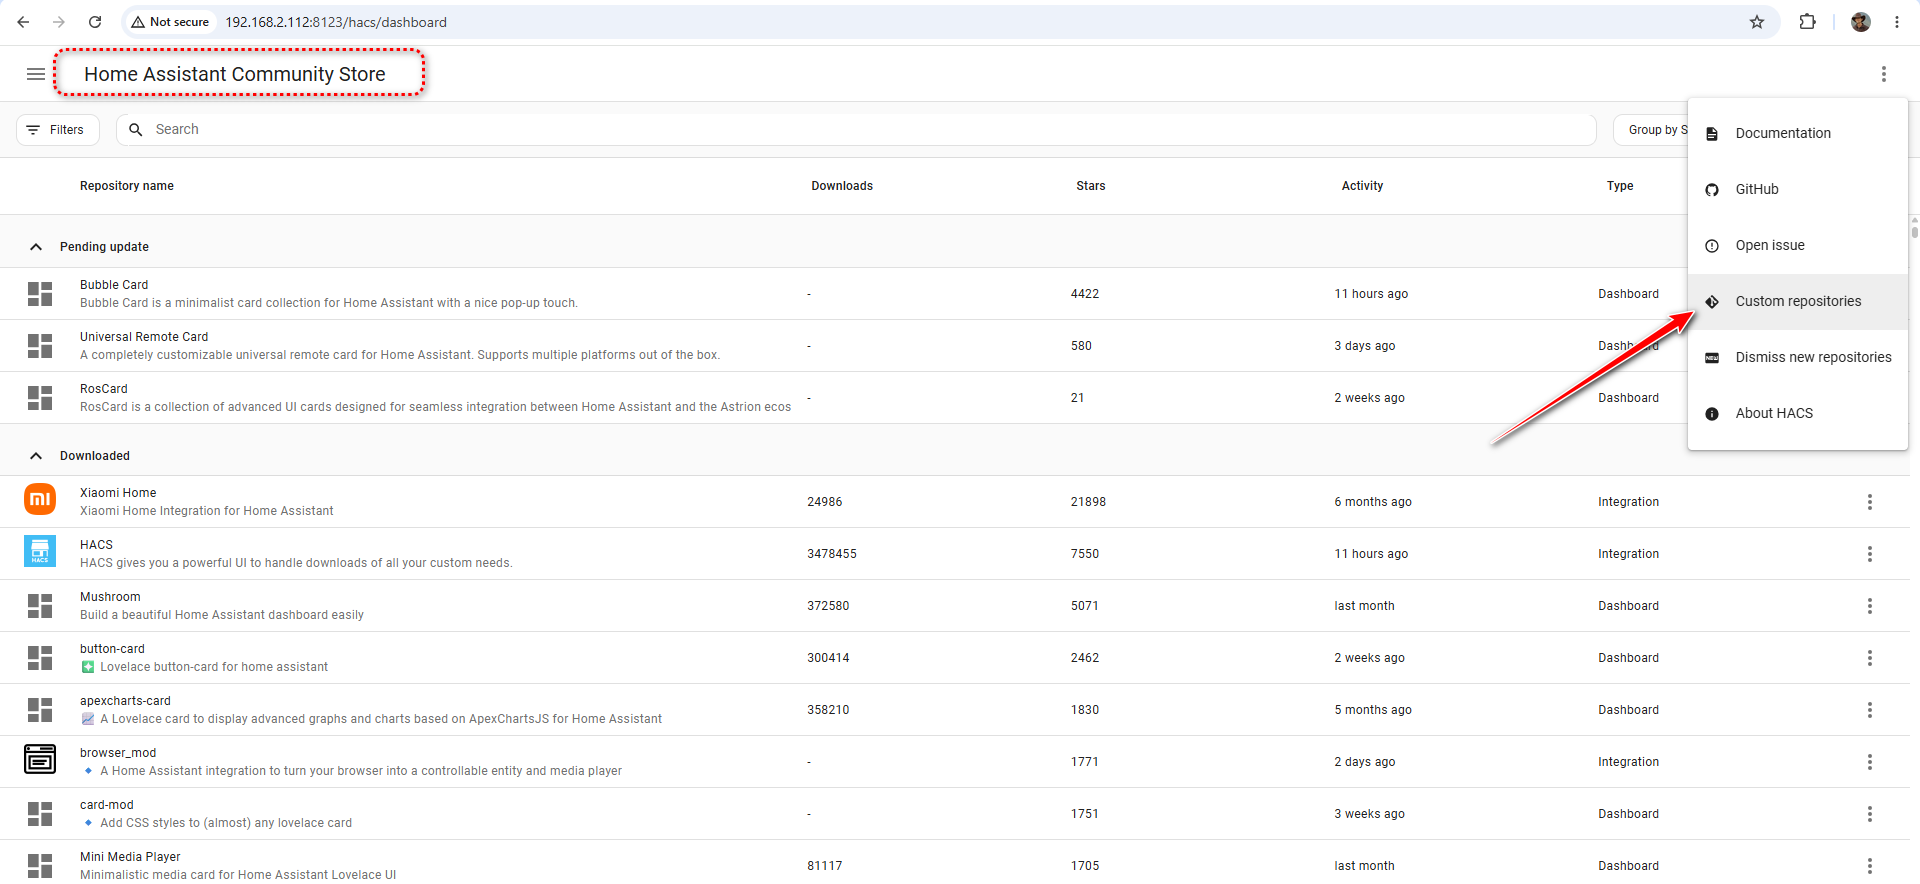
Method 1 — HACS (Recommended)
1 Open HACS
In Home Assistant, navigate to HACS → Frontend.
2 Search for RosCard
Search for RosCard in the HACS frontend repository list. RosCard is available in the default HACS repository — no custom repository URL is needed.
3 Install RosCard
Click Download and follow the installation prompts. Restart Home Assistant if prompted.
Method 2 — Manual Installation
- Copy the
/roscardfolder into:/config/www/ - Add resource in Dashboard:
/local/roscard/roscard.js - Restart Home Assistant
Card Types
RosCard provides a variety of card types optimized for the Astrion Remote's 3.1-inch display.
TV Control Card
Media player integration, script binding, directional & long-press controls
Media Player Card
Playback control, artwork & metadata display, source switching
Light Control Card
Brightness & color support, RGB/Color temperature modes, effect selection
Climate Control Card
Temperature adjustment, HVAC mode control
Scene & Script Card
Execute Home Assistant scenes, run scripts directly from Astrion
All RosCard Cards — Complete Index
RosCard supports 10 card types. Below is the complete list — click any card name to view its dedicated configuration guide.
Video Tutorials
Watch these video guides to see RosCard installation and configuration in action.
💡 Tip: The RosCard Configuration tutorial covers the entire workflow — from HACS installation to building your first dashboard. It's a great companion to the written guide above.
Configuration Examples
TV Card
The TV Card allows you to control your TV and media devices directly from the Astrion Remote.
type: custom:ros-tv-card
entity: media_player.living_room_tv
media_player: media_player.shield
power_on:
  service: script.tv_power_on
power_off:
  service: script.tv_power_off
Key Features:
- Multi-device routing — control TV and AVR from one card
- Script binding support — trigger automations with button presses
- Directional & long-press controls
Scene & Script Card
Execute Home Assistant scenes and scripts directly from your Astrion Remote. Perfect for activity-style automation workflows.
type: custom:ros-scene-card
entity: scene.movie_mode
Activity-Based Workflows (Harmony-Style Control)
RosCard supports activity-based workflows using Home Assistant scripts, Universal Media Player Input Select helpers, and automations.
Typical Activity Flow:
- Turn on TV
- Turn on AVR
- Select source
- Route volume control
- Update remote context
💡 Pro Tip: All activity logic is handled inside Home Assistant. This makes your setup more flexible and easier to maintain than traditional Harmony remotes.
Long Press Support
Astrion Remote supports long press on: Up/Down/Left/Right, Channel +/−, and Volume +/−. Users can bind scripts to long presses to implement fast forward, rewind, skip actions, or custom automation triggers.
Troubleshooting
Cards Not Showing on Astrion Remote
- Refresh the remote: If you connected the Astrion before creating the card, the remote will not update automatically. After the view has been created, select "Refresh" on the remote.
- Change the default home name: Modify the default home name, then refresh the remote.
- Update firmware: This issue has been resolved in version 1.0.31 — upgrade to the latest version.
Remote Shows "No Connection" After RosCard Install
- Verify both devices are on the same Wi-Fi network
- Check that your Home Assistant server is running
- Try restarting the remote and your HA server
⚠️ Important: RosCard requires Astrion Remote firmware ≥ 1.1.1. If you're running an older version, update your firmware via OTA before installing RosCard.
Related resources
Need help with RosCard?
Our support team and community are here to assist you.